What an airbrush cleaning solution actually is
An airbrush cleaning solution is a liquid formulated to break down paint residue inside the airbrush and carry it out of the paint path — not just wipe the outside of the body.
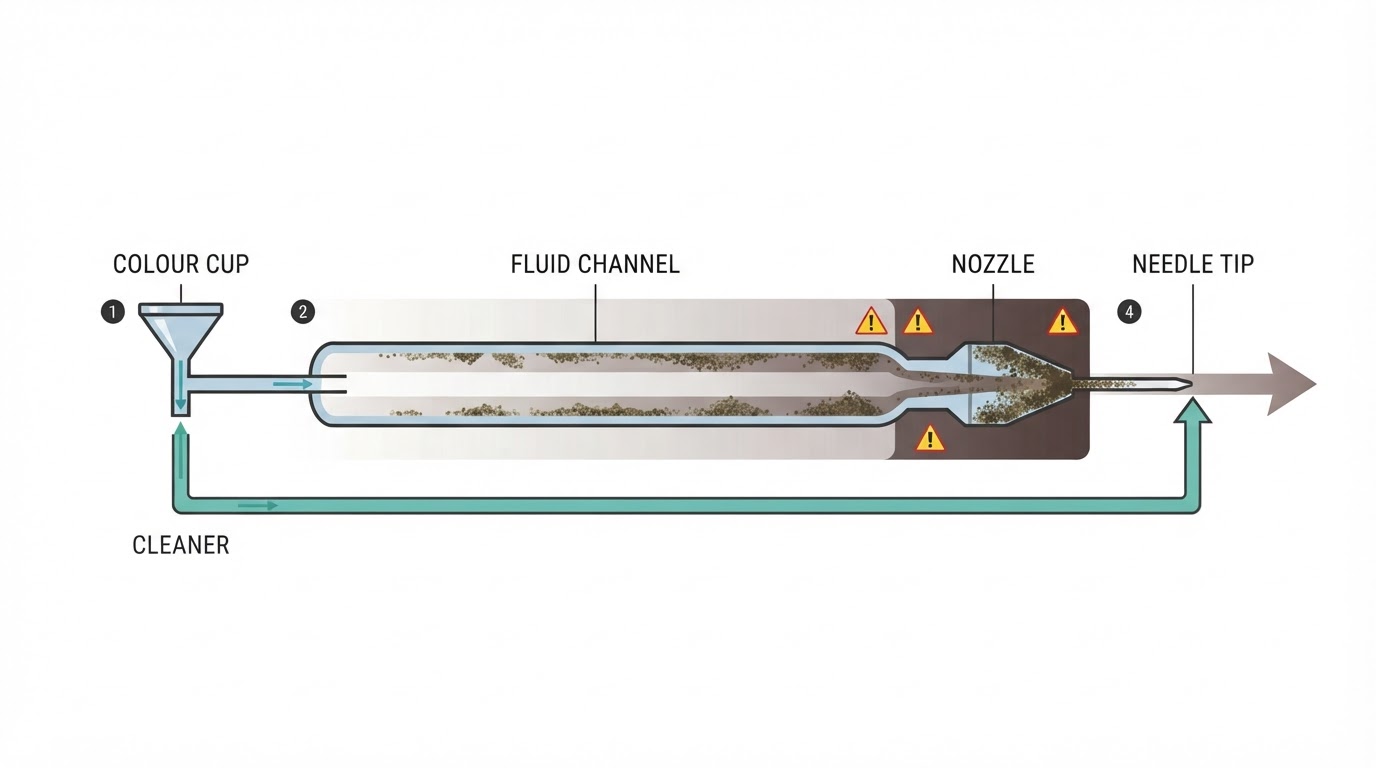
That distinction matters because most airbrush problems that feel like "my brush is dirty" are really "there is residue somewhere I cannot see". The paint path is the colour cup, the needle and nozzle, and the internal channel that carries paint to the tip, and that is where the residue that causes spitting and poor flow collects. A cleaner has to reach that path, dissolve what it finds there, and leave nothing behind that will interfere with the next colour.
Cleaning liquids for airbrushes usually fall into a few practical categories:
- Ready-to-use cleaners that go straight into the cup or a soaking tray.
- Concentrates that are mixed with water or another carrier at the ratio on the label.
- Water-based and solvent-based formulations, matched to the chemistry of the paint being sprayed.
Some paint lines sell their own thinner and their own cleaner, and some sell a single product intended for both jobs. Read the label rather than assuming any two bottles are interchangeable, because the same word on two labels can describe formulations built for different work.
One more thing worth knowing up front: a cleaning solution is not the same as a thinner. A thinner is added to paint to change how it sprays. A cleaner is used to remove paint from the equipment. Some products cross over, but treating them as the same thing is a common starting point for residue problems.
Why a general-purpose cleaner is a different tool
A general-purpose cleaner is formulated to lift grease and grime from household surfaces, while an airbrush cleaner is formulated to dissolve paint and leave a small, precise mechanism clean.
Four differences decide whether a substitute will work:
- What it dissolves. Paint residue is pigment and binder, not kitchen grease. A product built for one will often not touch the other. That is why a surface cleaner can leave dried paint untouched in the nozzle while making the exterior look spotless.
- What it leaves behind. Household products often contain film-forming agents, fragrance, or conditioning ingredients that are fine on a countertop and unwelcome in a fluid channel. A thin film that dries inside the nozzle behaves like a partial clog, and a film on the needle changes the spray pattern.
- What it does to the airbrush. Seals, O-rings, and plated or coated surfaces are chosen for paint solvents and cleaning fluids, not for whatever is strongest under the sink. Some household products attack those materials if they are left in contact, and the damage often shows up later as a leak, a sticky trigger, or a bubbling cup.
- How it behaves after cleaning. The last thing through the paint path should be something that rinses or evaporates away cleanly. A cleaner that leaves a residue creates the next problem you will be troubleshooting.
The practical rule: use a product whose label says it is intended for airbrush cleaning and names the paint families it handles. If you are ever stuck and have to improvise, test on a part you can replace, keep the contact time short, and rinse thoroughly before the next colour.
Match the solution to the paint you spray
Start with the cleanup recommendation on your paint's own label, because that is the shortest route to a compatible cleaner.
Paint manufacturers know what is in their product and what is needed to remove it. When the label names a thinner or cleaner for cleanup, that recommendation beats any general advice, including anything in this article.
Where labels do not settle the question, work by paint family:
- Water-based acrylics. While the paint is still wet, water can carry a lot of it away. Once acrylic has dried in the nozzle, water alone stops being enough and you need a cleaner formulated for acrylic residue. Cleaning before the paint cures is the single biggest time-saver in this whole process.
- Solvent-based finishes such as enamels and lacquers. These generally call for a solvent-based cleaner matched to the paint family. Using an acrylic cleaner on solvent residue mostly moves the paint around; using a hot solvent where it is not needed is hard on the airbrush for no benefit.
- Mixed benches. If you spray more than one paint family, keep a cleaner for each and clean in an order that keeps the most aggressive product away from the most delicate seals. Do not assume one bottle covers everything.
Two habits prevent most paint-family mix-ups. First, clean when you change colours, not only when you finish for the day, so residue never gets the time it needs to cure. Second, flush the cleaner out and blow air through before you load the next colour, because leftover cleaner can thin the first pass, bead on the surface, or change how the paint behaves on the model.
Also check the airbrush manufacturer's guidance on cleaning products. Seals and plated parts vary between brushes, and a cleaner that is safe in one airbrush can be rough on another.
Match it to the parts you are cleaning
Give the paint path full contact with the solution, and treat seals, plated surfaces, and the air valve with more restraint.
Not every part of an airbrush should be cleaned the same way, and most avoidable damage happens where the two get confused.
Paint-path parts: cup, nozzle, needle, tip, and the internal channel. These need the cleaner to reach them, which usually means flushing, a short soak, or both. The nozzle and needle area deserves the most patience, because the openings are tiny and residue there has the biggest effect on spray quality.
Seals and O-rings. Rubber and synthetic seals can swell, dry out, or harden with repeated exposure to the wrong fluid. Follow the airbrush instructions on whether seals should stay in place or come out before soaking, and respect the cleaner's stated contact time. Soaking longer does not clean better; it just exposes the seals for longer.
Plated and coated surfaces. Do not leave parts sitting in aggressive cleaner for extended periods. A few minutes of contact is usually plenty, and a wipe is often all the exterior needs.
The trigger and air-valve area. This is the part people over-clean. Flooding the air valve with solvent can wash away the lubricant the trigger relies on, which turns into a sticky action that feels like a mechanical fault. Wipe this area with a cloth dampened with cleaner instead of pouring cleaner into it.
Tools. Use soft cleaning brushes and the tools the airbrush maker supplies. Metal tools, wire, and abrasive pads can scratch the nozzle or bend the needle, and a scratched nozzle will never seal properly again. If a clog resists soaking, work on it gently rather than forcing the needle through it.
Ultrasonic cleaners. These can be useful for paint-path parts, but check the airbrush manufacturer's guidance first and do not put the whole airbrush in. Only immerse what is designed to be immersed.
A practical cleaning sequence that gets the residue out
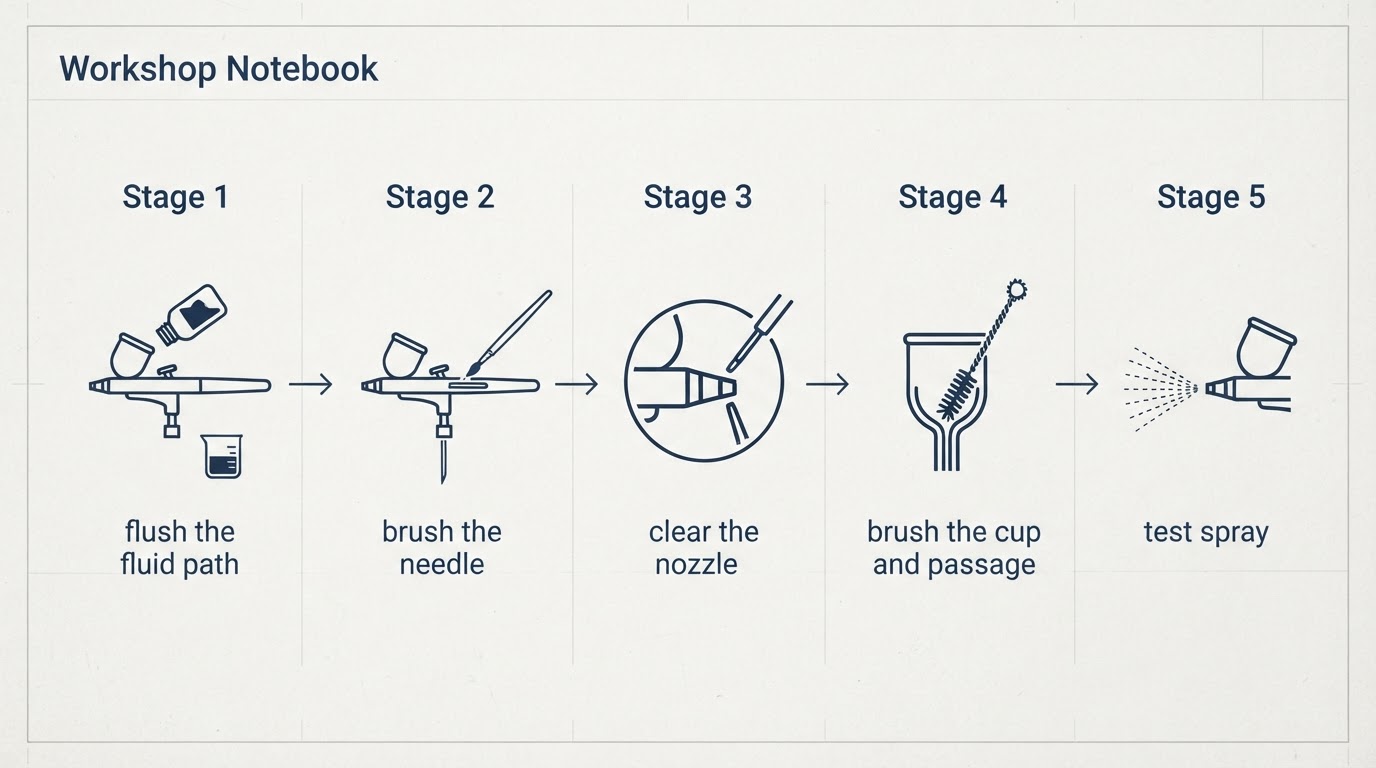
The reliable order is flush, soak only where needed, rinse, dry, and check — at every colour change and at the end of every session.
- Empty the cup. Return usable paint to its pot or tip it into a waste jar, then wipe the cup walls.
- Flush with cleaner. Add cleaner, spray it through until what comes out runs clear. Flush between colours, every time, before the paint in the channel has a chance to start drying.
- Back-flush if your airbrush instructions allow it. With cleaner in the cup and a finger over the nozzle, a short burst of air pushes cleaner back through the channel and loosens residue around the needle. Skip this step if the manufacturer advises against it.
- Soak the paint-path parts when residue has dried. Take the needle and nozzle assembly apart as the instructions direct, and soak only those parts, for the stated contact time.
- Lift what the soak loosened. Work over the nozzle and needle with a soft brush and careful attention. Do not scrape, and do not force anything through a nozzle.
- Rinse and dry. Flush with clean cleaner or the recommended rinse, then blow air through until the path is dry. Reassemble dry, and lubricate only where the manufacturer says to.
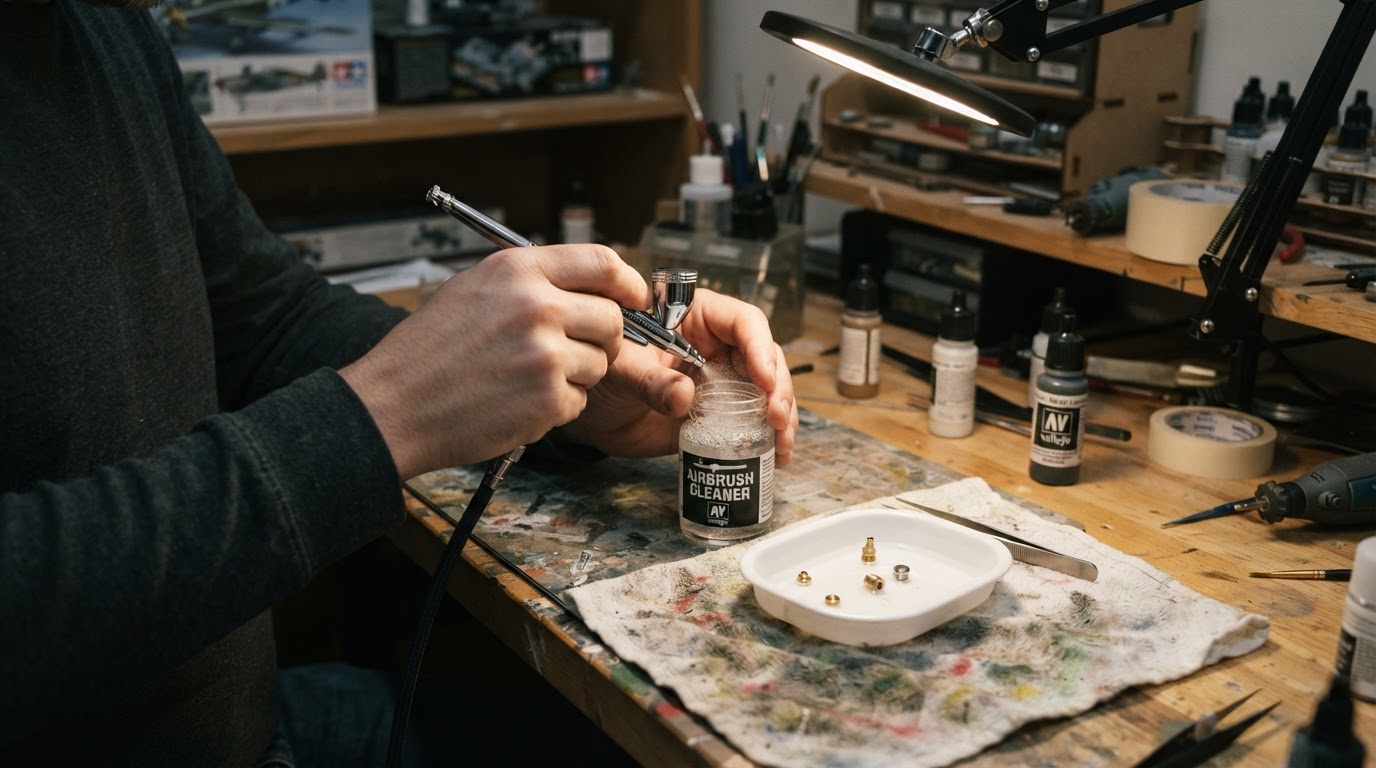
A simple completion standard: the final flush comes out clear, the trigger moves freely, and the first test spray lands in an even pattern. If any of those three fail, repeat the steps that touch the paint path rather than moving on to the next colour.
Cleaning and troubleshooting is treated as its own subject on Airbrush Modeler, which walks through how often a full clean is really needed, whether water alone is ever enough, the rinse sequence for a gravity-feed airbrush, clearing a clogged tip, and straightening or sharpening a bent or dull needle instead of replacing it. The same guides pair cleaning with the compressor water trap, because water in the airline causes paint problems that look exactly like a dirty airbrush.
Felo product screenshot.
How to tell the solution is doing its job
A cleaner is working when the flush runs clear, the mechanism moves freely, and the next test spray is even — everything else is guesswork.
Run these checks in order:
- Look at the flush. Clean liquid going in should come out clear, with no colour tint and no flecks of dried paint. Tinted or flecked output means residue is still in the path.
- Spray a test pattern. A quick spray onto paper or kitchen roll should give the same even pattern you expect from a clean brush, with no spitting, speckling, or sudden changes in shape.
- Watch the cup. Bubbles rising in the cup while you spray point to a nozzle or seat that is not sealing, and residue is a common reason.
- Feel the trigger and needle. The action should be smooth and the needle should return fully. If it feels sticky, cleaner may have reached the air valve and taken the lubricant with it.
- Check the tip after the test spray. Dried paint collecting on the tip almost immediately suggests the nozzle area is not fully clean, or the paint is too thick for the current setup.
- Judge the next colour. If it sprays true and covers predictably, the cleaning worked. If it beads, sprays thin, or repels, a film of cleaner or loosened residue is still in the path, and another flush is cheaper than a repaint.
When a check fails, the fix follows from what you saw. Dirty flush means more contact time or mechanical cleaning in the nozzle. Bubbles mean checking the nozzle and seat for residue or damage. A sticky trigger means the air valve needs attention and lubrication, not more solvent.
Mistakes that keep an airbrush dirty
- Waiting until the end of the session. The longer paint sits, the more it cures, and the harder every later step becomes.
- Soaking the whole airbrush. Immersing the air valve and trigger area does more harm than good.
- Using thinner as cleaner, or cleaner as thinner. Each has a job, and using one for the other causes residue or wrecked paint.
- Relying on water alone for dried paint. It works while acrylic is wet and stops working once it cures.
- Reaching for a household cleaner. It is designed for a different kind of dirt, and it can leave film behind.
- Skipping the rinse before the next colour. Leftover cleaner changes how the paint sprays.
- Forcing the needle through a clog. Gentle, repeated soaking is slower and safer than one hard push.
- Storing the brush with cleaner inside it. Fluid left in the paint path works on seals and leaves residue.
None of this requires a shelf full of products. It requires a cleaner matched to the paint you actually spray, a routine short enough to follow every session, and the discipline to check the flush and the test spray before you load the next colour.