What an airbrush cleaning kit actually is
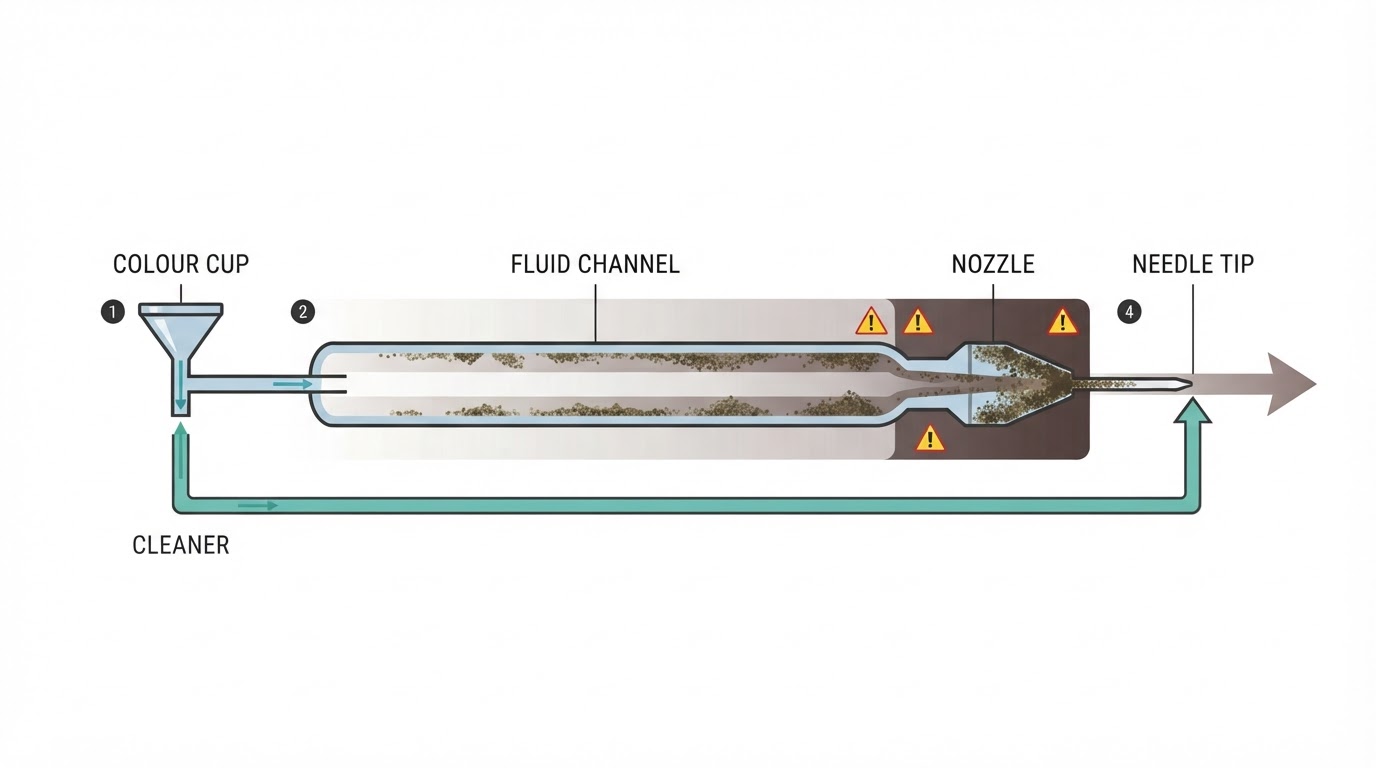
A cleaning kit is a box of physical tools for removing the paint that fluid alone will not shift. That distinction matters more than it sounds, because most airbrush cleaning happens with fluid and air, not with tools. You flush the brush, you push cleaner through it, and you wipe what comes out. The kit handles the leftovers: the ring of dried paint in the color cup, the flake sitting in the nozzle taper, the residue packed into the passage behind the nozzle.
A kit is not cleaning fluid, and it is not a repair kit. Fluid is a consumable you buy separately, and no brush in the world will straighten a bent needle or bring a worn nozzle back. What the kit gives you is reach, the right materials for the surfaces you are cleaning, and somewhere controlled to spray the dirty flush.
What a typical airbrush cleaning kit includes
Cleaning brushes. These are fine brushes sized to fit inside an airbrush. A kit usually starts with one small enough for the color cup and the body passages, and may add a finer brush for work around the nozzle. The bristles matter more than the handle: stiff enough to lift dried paint, soft enough not to scar the bore. An interdental brush can do the same job, which is why they turn up in kits and on benches. If a brush sheds, stop using it. A loose bristle left in the paint passage will find the nozzle eventually.
Cleaning needles or pokers. Thin wires with a blunt end. They are not the airbrush needle, and their job is to break up a blockage rather than scrape the bore clean. A good poker is soft enough and blunt enough that it cannot gouge brass or deform the nozzle taper. If the tool in the box looks like a sharpened needle, treat that as a warning rather than a feature.
A cleaning pot. A small jar, usually with a lid and a vent, that you spray into. It catches the flush instead of your bench, and some pots double as a stand that holds the airbrush while it drains. The pot is the part of the kit that changes how you work, so look at the base first. A pot that tips while you are spraying is a paint spill with extra steps.
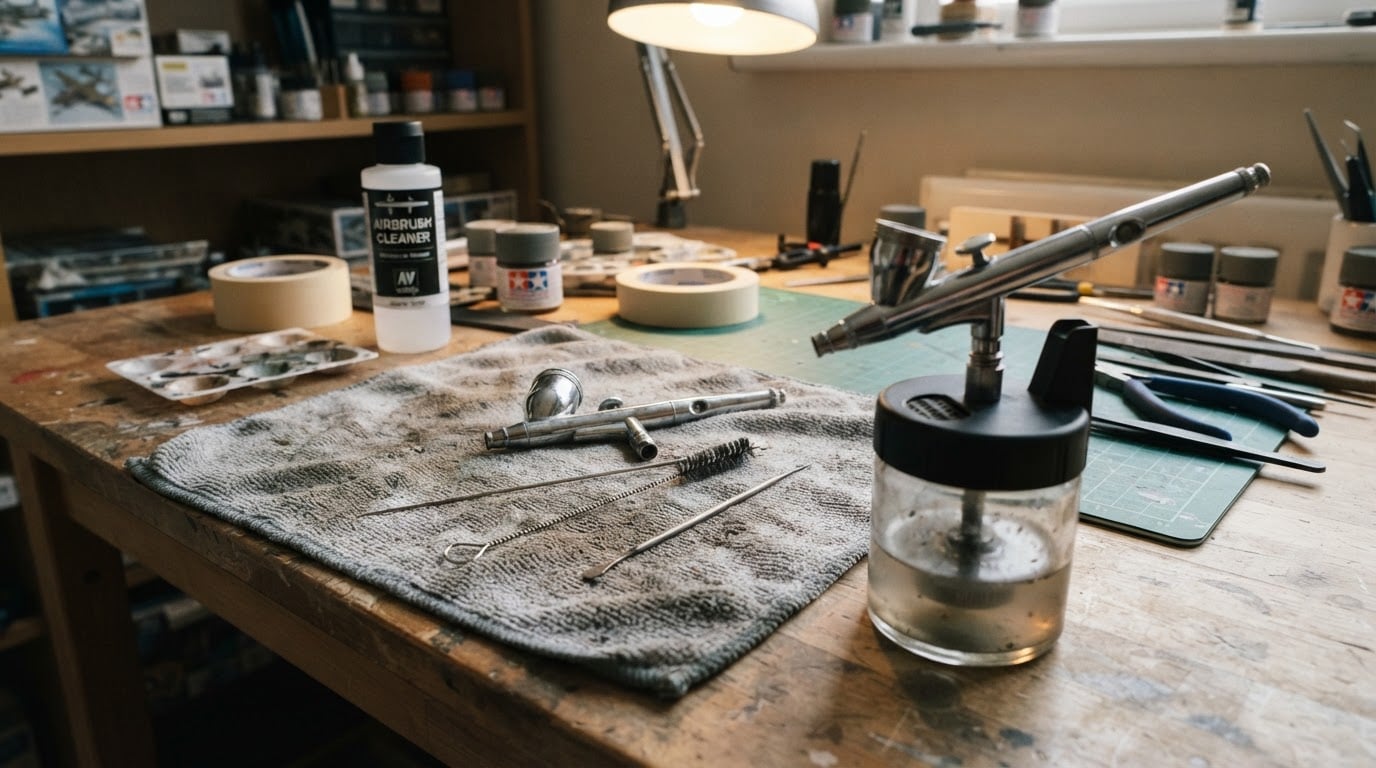
Some kits add a wrench, a dropper, a storage tray or a spare set of brushes. Treat those as extras. The brushes, the pokers and the pot decide whether the kit is useful.
How to choose a kit for your airbrush
Start with the airbrush, not the kit. Three things decide what you need.
The size class of your needle and nozzle. A detail setup and a primer setup are not cleaned with the same tools. Brushes and pokers that suit a fine nozzle are useless in a large bore, and a brush sized for a big bore can be too thick to enter a fine passage at all. Check the specification of your brush before you buy.
How far your airbrush comes apart. Some brushes are designed to be stripped down to the nozzle. Others have parts you should not force. Read the manual and buy tools for the parts you are allowed to remove. A kit that only makes sense if you dismantle something you should leave alone is the wrong kit.
How you spray. If you change colors several times in a session, priority goes to a fast rinse setup: a pot, a brush that reaches the color cup quickly, and a poker for the occasional flake. If you spray one color at a time and clean at the end, the finer brushes and a thin poker earn their place instead.
Four checks separate a useful kit from a disappointing one:
- Bristles are fine, firm and firmly attached, with no loose fibres and no exposed metal core that can scratch the bore.
- Pokers are blunt-tipped and softer than the metal they will touch. A sharp tip will mark the nozzle.
- The pot is stable, its lid stays put, and its opening is wide enough to aim at without spraying your fingers.
- The tool sizes match your airbrush. A full set in the wrong sizes is worse than one brush that fits.
Airbrush Modeler treats cleaning and maintenance as its own subject rather than an afterthought, covering how often to clean, whether water alone is enough, the rinse workflow for a gravity-feed airbrush, clearing a clogged tip, and repairing a bent or dull needle instead of replacing it. That is the right shape for this job: one clear answer per question, not a pile of gear.
Felo product screenshot.
How to use the tools without damaging the needle, nozzle or passages
Flush first and keep the tools for the leftovers
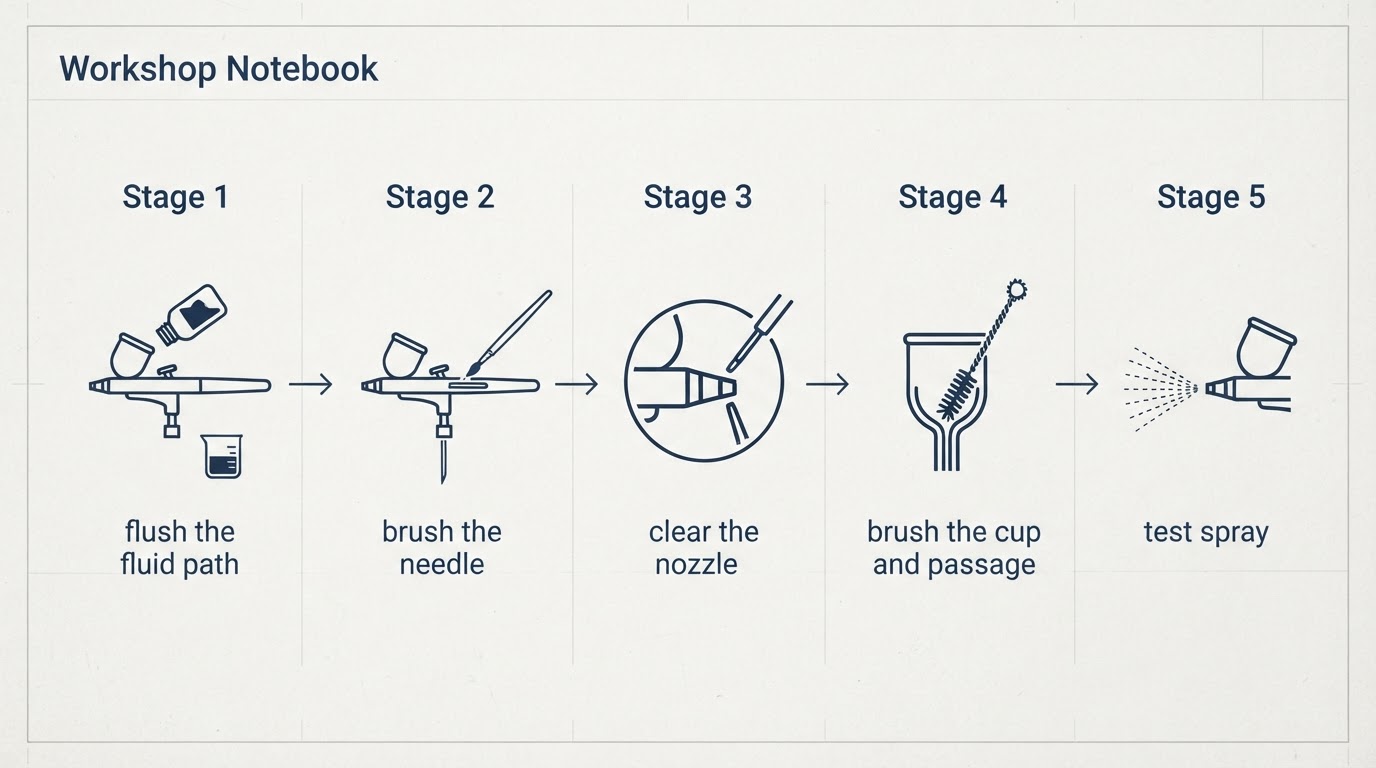
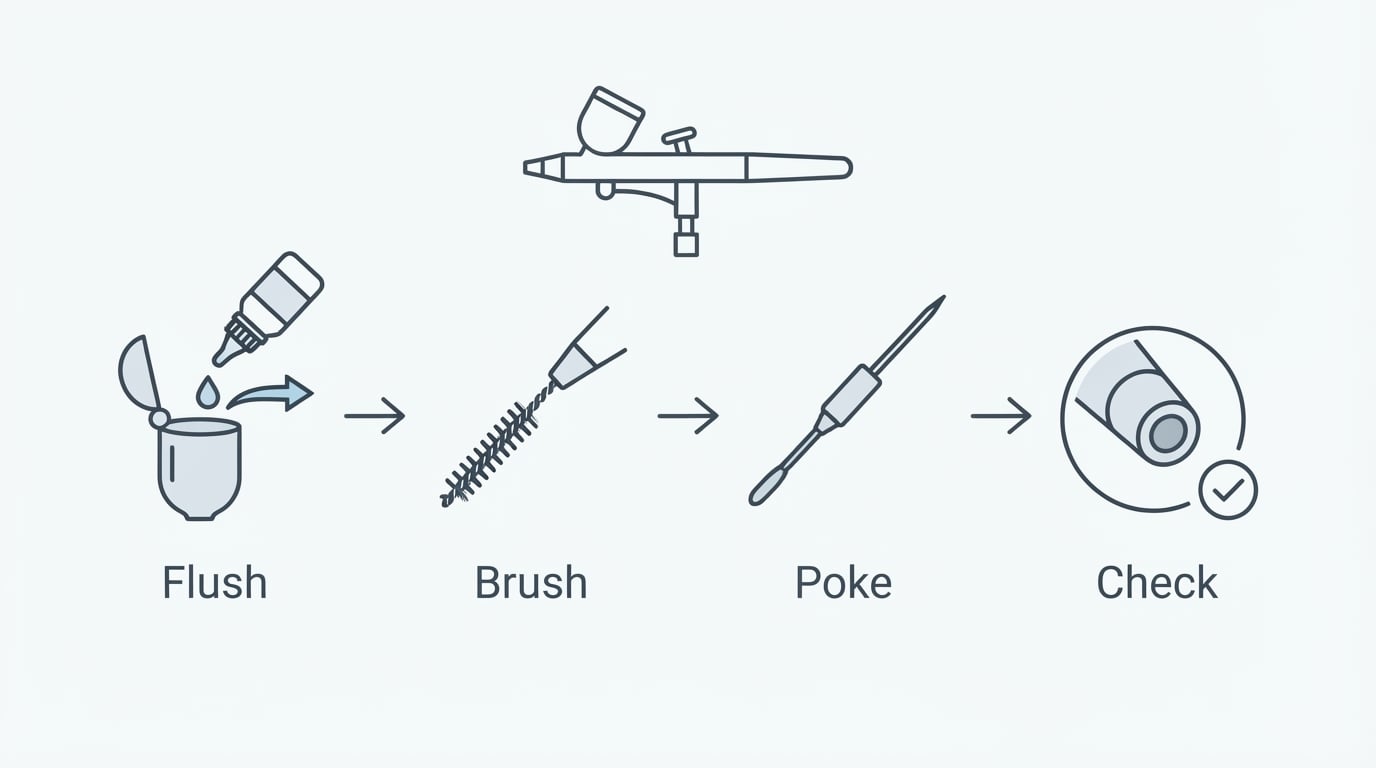
Run fluid through the brush and spray it into the pot before you reach for anything else. Most of the paint leaves during this step, and a tool used on wet residue is far less likely to mark metal than a tool forced into dried paint. Flush early, even when the blockage is still there.
Strip down only as far as the manual allows
Every part you remove is a part you can cross-thread, lose or overtighten on the way back. Follow the maker's order. If you do not have the manual, clean what you can reach and leave the rest alone until you do.
Brush from the wide end toward the narrow end
Work a wet brush through the color cup and the body passage in the direction the paint flows, and let the tips of the bristles do the work. Do not jam a brush sideways into the nozzle taper. If it will not pass easily, it is the wrong size for that passage.
Poke gently, and only where the taper lets you
A poker is for lifting a flake, not for driving it through the brush. Put the blunt tip into the nozzle opening, turn it lightly to break the paint loose, and pull it back out. Never lever the tool sideways. The nozzle taper is the thinnest and most easily deformed part of an airbrush.
Never use the airbrush needle as a cleaning tool
The needle is the most delicate part in the brush. Pushing it through dried paint, or using it to shove a blockage along the passage, is how a straight needle becomes a hook. Pull it out the way your manual specifies, wipe it, and set it somewhere safe while you clean.
Check the tip while the needle is out
Roll the needle across a clean surface and look at the point. A slight bend is a repair decision. A hooked or blunted tip is a replacement decision. Check the nozzle the same way, and if paint has hardened onto it, soak the parts your manual says can be soaked instead of scraping them.
Reassemble dry and confirm the result
Put the brush back together without forcing anything, and do not overtighten the nozzle. Then run clean fluid through it and spray a test pattern onto paper. An even cone with no spitting or surging means the brush is clean. A sputter, a weak spray or a visible flake in the pattern means something is still in the passage, so go back to the flush rather than the poker.
Three signs you are about to damage something: you are pushing a tool against resistance, you are using a metal tool on a brass or coated surface, or you are cleaning a part the manual says to leave alone. Stop at the first one.
A kit has a ceiling, too. It cannot straighten a needle, restore a worn nozzle, or rescue a brush whose seals have met the wrong fluid. If the tip is damaged, a new needle and nozzle is the fix, and careful poking will not change that.
When a kit is worth it and when it is not
Improvised cleaning works better than its reputation suggests. A flush with water or cleaner, an old soft toothbrush for the outside of the body, and a paper towel for the needle covers most of what a casual user needs. The problem is the gap between those tools and the places paint actually collects. Cotton swabs are often too fat for a color cup and leave fibres behind. A toothbrush cannot enter a passage. A piece of wire used to clear a nozzle will mark the taper the first time you push too hard.
A kit earns its place when three things are true. You clean often enough that the process should be quick. You clean deeply enough that tools must reach inside the brush. And one damaged nozzle costs more than the kit does. For a builder who changes colors several times a session, or who has already bent a needle while improvising, a kit pays for itself in avoided replacements and in time not spent fighting a blockage.
A kit is not worth it when the brush rarely leaves the shelf, when the airbrush comes apart into two parts and rinses under a tap, or when the money would do more good in a spare needle and nozzle. And a kit never replaces the habit that protects a brush best: flushing before the paint has time to dry. Tools do not reduce how often you need to clean, and that is the trade-off most kit buyers get wrong.
A short routine that keeps the kit useful
Flush at the end of every session and wipe the needle. Spray a test pattern before you put the brush away, so a blockage is found at the bench rather than halfway through a paint job. Once a week, or after a long session, use the brushes and pokers on the parts your manual allows you to reach. Keep the pot empty and rinsed so the next flush does not start with a layer of old paint.
That is the standard worth aiming for: an airbrush that sprays an even cone on command, tools that go back in the box clean, and a needle that has never been used as a cleaning implement.