The Tank Drain and the Moisture Filter Are Two Different Jobs
Most compact airbrush compressors give water two places to collect. One is the moisture filter or moisture trap near the regulator, often a clear bowl with a small pin valve underneath. The other is the air storage tank itself, which on many compact units is the tubular carry handle or a cylinder beneath the motor housing.
The filter catches water on its way to the hose. Pushing up on its drain pin empties the bowl, but it does nothing for the tank. Condensation that forms inside the storage tank stays there until you open the tank drain. On the Iwata IS875HT and IS925HT, the manual describes the carry handle as the air storage tank and puts the tank drain valve at the back of that tank. On other compressors the drain may be a nut, a knurled thumbscrew, a petcock, or a small ball valve near the lowest point of the tank.
If water still spits after you empty the filter bowl, tank drainage is one maintenance item worth checking, but it is not proof that the tank is the missing cause. Work through the airbrush troubleshooting guide before you assume the tank is responsible. The clear bowl and the tank drain are separate maintenance points, and clearing one does not clear the other.
Why Water Ends Up in the Tank
Air that is drawn into the compressor heats up as it is compressed, and it carries water vapor with it. Once that air cools inside the storage tank, some of the vapor condenses on the tank walls and runs to the bottom. The moisture filter removes water from the air stream, but it sits downstream of the tank, so it cannot dry out the tank itself.
How fast water accumulates depends on the humidity in your work area and on how long the compressor runs. A shop in a damp climate can put a visible puddle in a tank in a few sessions; a dry room may take much longer. That is why manufacturer instructions tend to describe the interval in terms of each use or local humidity rather than a fixed number of days.
What to Do Before You Open the Drain
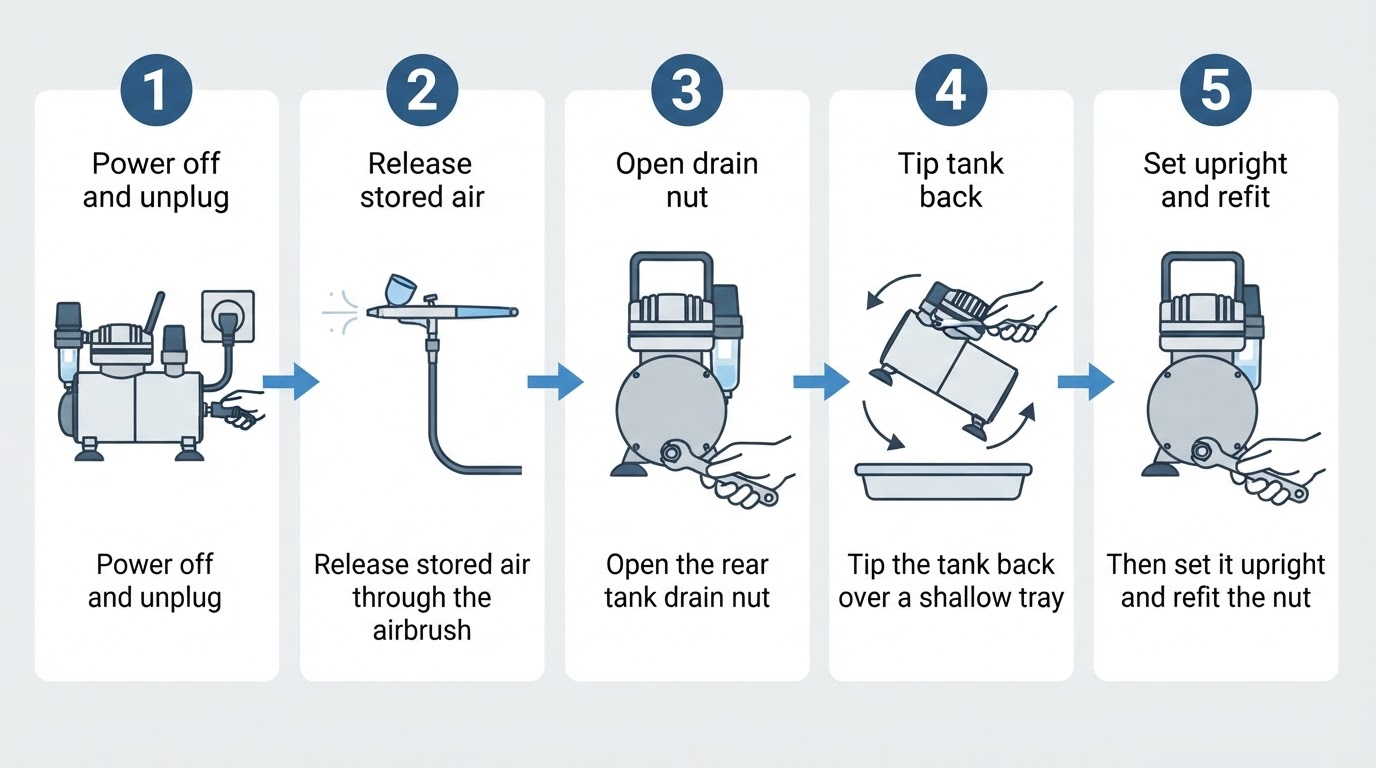
- Turn the compressor off and unplug it. Manuals usually start with the power switch, but pulling the plug removes any chance of the motor restarting while your hand is near the drain.
- Release the stored air. On the Iwata models, the manual says to depressurize the tank by releasing the remaining air through the airbrush or through the moisture drain valve. If there is paint in the cup, spray onto a rag or empty the cup first so the release does not spit paint across your bench.
- Let hot parts cool and keep electrical connections dry. The compressor head gets hot during use, and water around the plug, switch, or motor housing is an unnecessary risk.
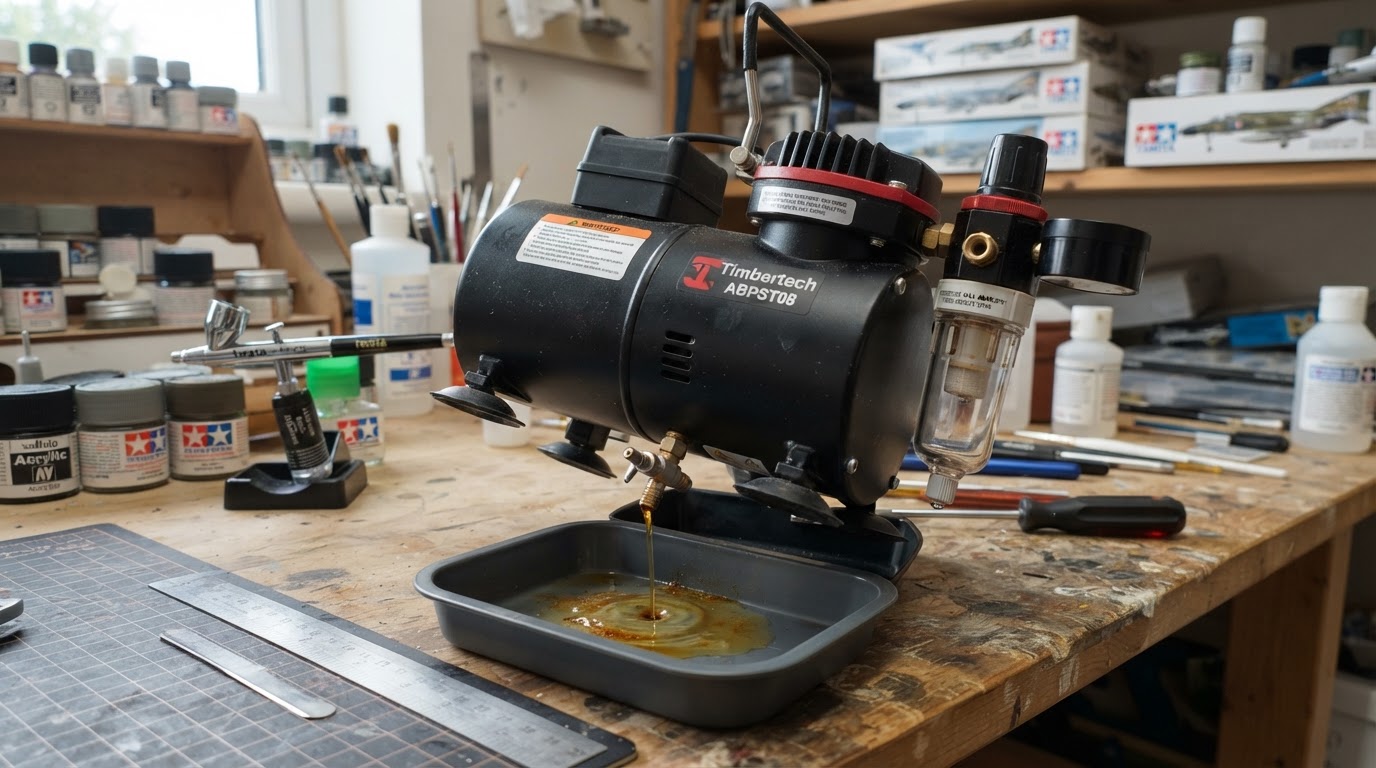
- Put a shallow tray, folded towel, or container under the drain. The first discharge is usually water, and it can carry loose material from the tank that stains a work surface.
There is no universal residual-pressure figure to aim for. Follow your own manual: some procedures have you release the air until the tank is empty, while others rely on a little remaining pressure to push water out. If the manual says nothing about pressure, fully depressurizing before you open the drain is the conservative choice.
The Iwata IS875HT and IS925HT Sequence
The clearest published example is the IS875HT/IS925HT operating manual. Its draining procedure has six steps:
- Turn off the compressor.
- Depressurize the tank by releasing the remaining air through the airbrush or the moisture drain valve.
- Unscrew the nut from the air tank drain valve on the back of the air storage tank.
- Tip the compressor back and let it drain.
- When it finishes draining, set the compressor upright.
- Screw the nut back into the air tank drain valve.
Two details matter. The drain is a nut on the rear of the tank, not the pin under the clear filter bowl. And the tipping step is part of the procedure: with the drain at the back, gravity alone will not move water sitting at the front of the tank.
The same manual recommends draining the tank after every use for optimal lifespan, and notes that how often you need to do it depends on the humidity in the air. Those instructions describe the IS875HT and the IS925HT, not every compressor.
What Finished Draining Looks Like
A drain is complete when the water stops running from the fitting as the manual describes. With the nut-style drain on the Iwata tank, let the collected liquid finish draining while the unit is tipped, then set the compressor upright as the manual directs. Do not expect a completely dry interior: condensation can remain inside the tank, and the routine is meant to remove the collected water, not to dry the steel.
Close the drain snugly, but do not treat it as a place to apply maximum force. If the fitting will not seal or keeps leaking, stop and check the manufacturer's guidance rather than tightening harder. After the drain is closed, the compressor can be stored without pressure.
Reading Your Own Manual's Drain Procedure
Manual writers use different names for the same parts, which is why the first step is often the one that confuses people. Look for a parts diagram or callout list, find the air tank, and then look for the fitting at its lowest point or rear face. Common labels include air tank drain valve, tank drain, drain cock, and petcock. The moisture filter will be listed separately, usually near the regulator and gauge.
Then find the maintenance or end-of-session section. Note three things: whether the drain is opened by hand or with a tool, whether the manual tells you to tip the unit, and whether it asks you to leave any pressure in the tank. Those three answers shape the procedure more than the brand name does.
If your manual is missing or unreadable, the model number on the voltage label or the bottom of the case is what a manufacturer's support line needs. Describe the fitting at the lowest point or rear face of the tank, and ask the maker to confirm that it is the drain shown in the parts diagram.
Other Compressors Use Different Hardware
Drain hardware varies, so identify the fitting from your own parts diagram rather than assuming it matches the Iwata arrangement. The practical differences are the fitting type and the direction of the tilt. A drain at the rear of a horizontal tank needs the rear lowered; a drain at the bottom of an upright tank needs the unit leaned toward that corner. Tankless compressors have no storage tank to drain at all. Their filter bowl still needs clearing, but that is a separate maintenance task, not a tank drain, and no amount of tipping will replace it.
When the Drain Will Not Move
A drain nut or valve that is seized or corroded is not a reason to improvise. Do not remove a fitting that the manual does not identify as the drain, and do not put a cheater bar on a small drain nut.
Work within the manual: confirm the tank is fully depressurized, apply steady hand pressure rather than impact, and if the fitting still will not turn, stop. Unexpected corrosion, leakage, or damaged hardware warrants the manufacturer's or a service shop's guidance rather than a workaround. Replacing a drain valve is a better outcome than damaging a tank fitting or rounding off the nut.
A Short Routine That Prevents the Problem
The habit that keeps tank water from building up is timing, not force. Drain at the end of every session, while the compressor is already off and the airbrush is already clean. Empty the moisture filter bowl at the same time so both collection points are handled together. If you paint in a humid shop or run long sessions, check the filter bowl during the session and drain the tank more often than the manual's minimum.
Both jobs take a minute, and doing them together keeps the filter bowl from becoming the only water trap you remember to empty.