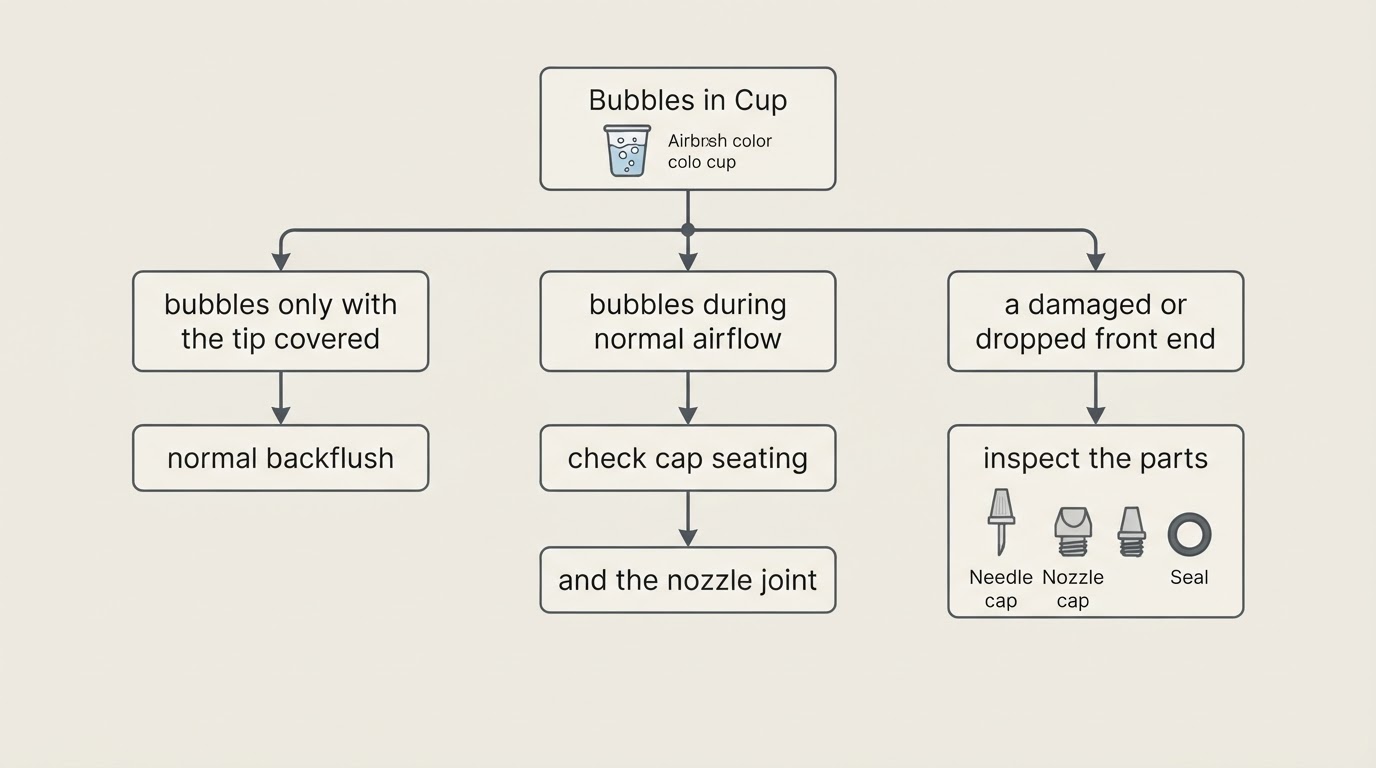
Unexpected bubbles in the color cup mean air is entering the fluid path ahead of the nozzle outlet. They are a direction, not a diagnosis: the symptom cannot tell you which part or blockage is responsible.
One case is not a fault: if your manual allows a backflush and you follow it, blocking the front end so air pushes back through the fluid passage, bubbles are the technique working as intended. Bubbles during ordinary spraying on an unblocked brush are the opposite. Unexpected bubbling means air is travelling back into the fluid path; front-end blockage, seating or sealing problems, and mismatched or damaged parts are checks, not confirmed causes. The checks below narrow the possibilities, but they do not guarantee that you will find the fault.
What changed before the bubbling started
When the first bubbles appear narrows which joints are likely, but it is not proof of a cause: the same timing can come from more than one part. Record what you see, and stop where the row says instead of adding force.
When bubbling started | Record first | Check first, per your manual | Stop when |
|---|---|---|---|
Just reassembled | What you removed, the rebuild order, and part codes on cap, nozzle and needle | Assembly order and orientation against the parts diagram, then the seating surfaces; dried paint can hold a joint open | A part is cracked, cross-threaded or will not seat without force: fit the exact-model part |
Started during a session | Color, thinner ratio, idle time and pressure changes since the last clean spray | The manual's cleaning steps for the fluid path, and whether the medium suits your model | Bubbles survive a manual-correct clean: do not ream the nozzle or force backflushes |
Only with the cap blocked | Whether you blocked the front end on purpose, and which procedure you used | Whether your manual describes a backflush, and if so its exact steps and order | Your manual lacks that backflush: stop improvising it; treat normal-spray bubbling as the symptom |
Started after a parts change | Part numbers of everything replaced, and whether they match your model revision | The maker's parts list for your model, then whether the new parts seat as shown | A part is not the one your model lists, or will not seat: return to the exact-model part |
Timing points at a direction, not a verdict: two rows can look alike and end in different parts. Record what actually changed, and let the checks — not extra torque — decide.
Threaded or drop-in: check by structure
Nozzle families sit and seal differently, so identify yours from the manual or parts diagram before you touch the front end; technique does not transfer.
- Threaded nozzle. The nozzle screws into the body. Inspect the threads and seat, start it by hand, and finish with the tool your manual names, turning only as far as the manual describes. There is no universal torque figure; the model's instructions are the specification.
- Compression or drop-in nozzle. The nozzle is held by the head or cap and presses against a seat rather than its own threads, so it must sit square before the cap is drawn down. Alignment comes from the cap — a wrench for threaded nozzles can be the wrong tool here.
Three boundaries hold for both: do not over-tighten while chasing a seal, do not push a wire or hardened tool through the nozzle, and do not grind a sealing face. Clean only what your manual allows you to soak, with the cleaner it names, and test-spray only as it describes. Backflush and wet-test routines are model-specific; where the manual is silent, do not invent a universal water or solvent rule. If paint will not flow at all, start with the no-paint-flow checks.
What one maker's published guidance shows — and does not
Iwata's FAQ says bubbles in the fluid cup or bottle are usually caused by an air leak, and gives its own model-specific order of checks: make sure the nozzle cap is finger-tight, and on the Eclipse series only, the air cap may be tightened with a wrench; remove and reinsert the nozzle — for older airbrushes it suggests trying Medea Thread Sealer on the nozzle threads if there are scratches where the nozzle meets the body — and if the brush still bubbles, the nozzle may need replacing (Iwata FAQ). Its cleaning guide adds one limit: never immerse the whole airbrush in liquid (Iwata airbrush cleaning guide).
Read those as one maker's guidance for its own models — not a universal seal structure, not permission to hand-tighten every nozzle, and not a promise that every bubbling brush has an air leak: the FAQ itself says usually, not always. The thread-sealer step concerns nozzle threads, so it belongs to airbrushes whose nozzles screw in; it is not a procedure for drop-in or compression nozzles, which seal without threads of their own. The Eclipse wrench step is that series' instruction, not a rule that every air cap needs a wrench. Your manual and parts diagram decide.
The order that keeps the front end safe
If the timing table has not pointed to an answer, work through these stages from cheapest to most invasive.
- Parts. Confirm the cap, nozzle and needle match the maker's listing for your exact model and revision.
- Blockage. Inspect the nozzle seat, cap threads and needle front for dried paint or debris; clean only what the manual lets you soak.
- Seals and assembly. Rebuild in the manual's order, start threaded parts by hand, and stop where the manual says seated.
- Test. Run the test your manual describes, then spray a pattern on paper and compare it with your notes.
Two stop rules end the process. A cracked or out-of-round nozzle is replaced with the exact-model part. A fault that survives a clean, correctly matched, correctly assembled front end belongs with the maker or a service center, not a larger wrench. If the front end checks out and the needle is worn, follow the model's steps in how to replace an airbrush needle. The airbrush troubleshooting diagnostic orders these checks, but it only sorts directions to investigate: it does not confirm which part failed or promise a repair.